
I have pulled more failed HPLC filter frits out of injection ports than I care to admit. Some were crushed flat by over-torqued fittings. Some were plugged solid with buffer salts because the line sat idle over a long weekend. One memorable specimen had a pinhole you could see under a loupe, and the analyst had been chasing a ghost peak for three weeks. Every one of those failures was preventable, and none of them were caused by the filter being “bad.” They were caused by a mismatch between the filter’s actual limits and what the method asked it to do.
This article walks through the failures I see most often in routine HPLC work, what actually causes them, and the parameters you can set to stop them happening. If you are running USP methods, EPA SW-846 digestion and extraction workflows, or just pushing a lot of samples through a 1260 or an UltiMate, the same physics applies.
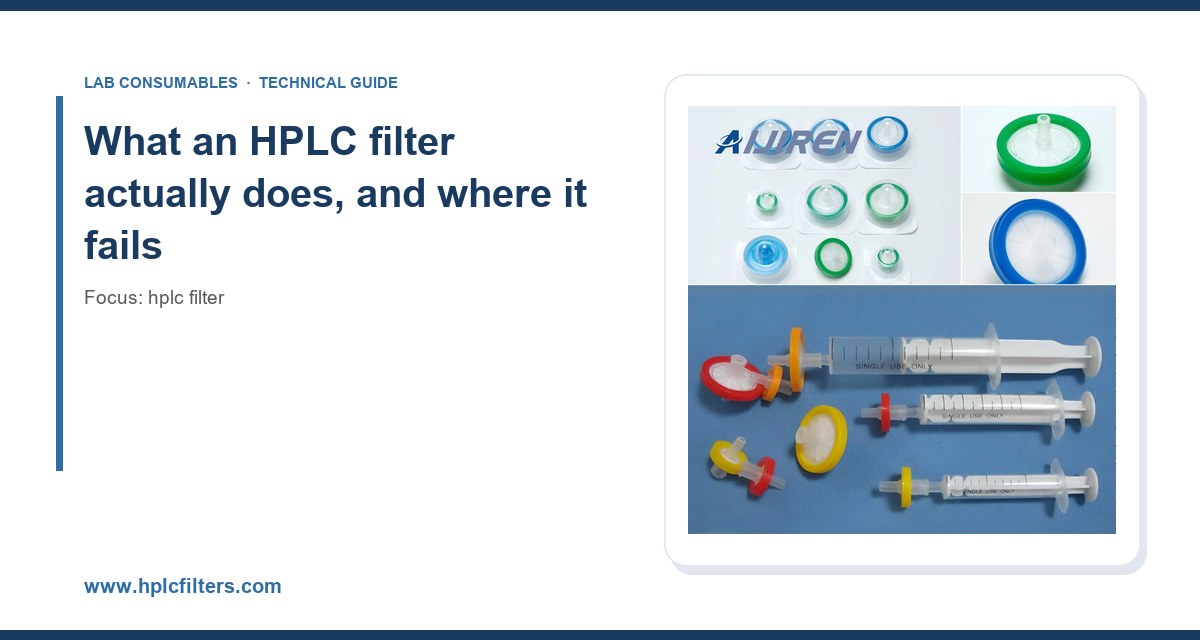
A filter in an HPLC flow path is a depth or surface barrier with a defined pore rating. In sample preparation it is a syringe filter, typically 0.22 µm or 0.45 µm, with a membrane of PTFE, PVDF, nylon, PES, or regenerated cellulose. In the flow path itself it is a frit, usually 0.5 µm to 2 µm sintered stainless steel or PEEK, sitting in the mobile phase inlet, the pump outlet, or the column end. Both types do the same job: stop particles that would otherwise plug the column bed, score the piston seal, or block a check valve.
Failures cluster into five categories. I will take each one in turn.
1. Mechanical failure: over-torque and mismatched fittings
This is the most common failure I see on inlet frits and inline filters. The frit itself is fine. The housing or the ferrule has been crushed.
A standard 1/16 in. stainless ferrule on a 10-32 coned port needs roughly 0.5 to 0.7 N·m (about 4.5 to 6.2 in·lb) to seal. PEEK ferrules want less, closer to 0.3 to 0.4 N·m, because they cold-flow. I have watched people put a 3/8 in. wrench on a 10-32 fitting and lean on it. That is 3 to 4 N·m, and it will deform the port cone, crack a PEEK frit housing, and cold-weld the ferrule to the tubing. The next person to service the line has to cut the tubing off.
The failure mode is subtle: the frit housing cracks at the shoulder, the crack opens under pressure, and you get a slow leak that only shows up above 200 bar. Or the frit is pushed back into the housing and bypasses entirely, so particles go straight to the column.
Prevention is boring and effective. Use a torque wrench rated for the fitting size. Hand-tight plus a quarter turn is not a specification. Keep a fitting log if you have multiple analysts on the same instrument. Replace PEEK ferrules after three makeups, not after they fail.
2. Chemical incompatibility: the wrong membrane for the mobile phase
I have seen nylon syringe filters dissolve in a 100% acetonitrile sample. Nylon is a polyamide. It swells and degrades in strong aprotic solvents. The analyst saw a rising baseline, a new peak at 4.2 minutes, and assumed column contamination. The column was fine. The filter was shedding oligomers into the vial.
Here is the compatibility table I keep taped inside a lab cabinet:
- PTFE: compatible with nearly all HPLC solvents, aqueous and organic, strong acids and bases. Hydrophobic, so it needs a pre-wet with methanol or acetonitrile before aqueous samples. This is the default choice for aggressive mobile phases. If you are filtering DMSO, THF, or concentrated TFA, use a PTFE membrane filter.
- PVDF: good general-purpose, low protein binding, compatible with most aqueous and organic solvents. Not for strong bases above pH 12.
- Nylon: excellent for aqueous and mild organic, but avoid with pure acetonitrile, DMSO, and dichloromethane.
- PES: fast flow, low protein binding, aqueous only. Degrades in many organic solvents.
- Regenerated cellulose: good solvent resistance, low extractables, but slower flow and higher cost.
The extractables question matters more than most people think. A 13 mm syringe filter with a poor-quality housing can leach UV-active compounds at levels that show up in a 210 nm chromatogram. I have measured extractable peaks of 0.5 to 2 mAU from cheap filters in a blank injection. That is enough to fail a system suitability check on a low-level impurity method. Buy from a supplier who will give you an extractables report, and run a filter blank before you trust a new lot.
3. Particulate loading: when the filter becomes the problem
A filter has a finite capacity. Once the pores fill, the pressure drop rises, flow stops, and the filter either bursts or bypasses. The question is how much particulate a given filter can hold before that happens.
For a 25 mm syringe filter with a 0.45 µm membrane, practical loading is on the order of 2 to 5 mg of solids before flow drops noticeably. A 13 mm filter holds maybe a third of that. If you are filtering a sample that has been through a protein precipitation with ammonium sulfate, or a soil extract from an EPA SW-846 method, that capacity is gone in one or two milliliters.
The fix is prefiltration, not a bigger filter. A glass fiber prefilter (typically 1 µm nominal) upstream of the membrane catches the bulk load and lets the membrane do its job. For high-solids samples, centrifuge at 10,000 to 14,000 × g for 5 minutes before you touch a syringe filter. I have seen that single step extend filter life by a factor of five on plasma extracts.
If you are running a lot of samples, consider a HPLC filter sized to your sample volume and particulate load rather than grabbing whatever is in the drawer. A 4 mm filter on a 2 mL sample is a false economy.
4. Pore size mismatch and the 0.22 vs 0.45 argument
This one causes more arguments in labs than almost anything else. The rule is simple: the filter pore size should be at least as small as the column frit rating, and ideally half of it.
Most analytical columns have inlet frits rated at 0.5 to 2 µm. A 0.45 µm filter is fine for those. UHPLC columns with sub-2 µm particles often have frits rated at 0.2 µm, and there a 0.22 µm filter is the correct choice. If you filter a UHPLC sample through a 0.45 µm membrane, particles between 0.22 and 0.45 µm pass through and can bridge across the column frit, which is exactly the failure mode that produces a rising backpressure over 200 injections.
The counterargument is that 0.22 µm filters plug faster and can adsorb analytes. Both are true. The answer is to match the filter to the column, not to pick one size for the whole lab. Label the filter drawers accordingly and stop the argument.
5. Drying, salt precipitation, and idle-line failures
This is the failure that bites on Monday morning. A line sits over the weekend with a phosphate buffer in it. The water evaporates from the frit face, the buffer salts crystallize in the pores, and the frit is now a solid plug. Backpressure spikes on startup, the pump stalls, and someone blames the check valve.
The same thing happens inside a syringe filter if you filter a buffered sample and let the filter sit. And it happens in the mobile phase inlet frit if the reservoir runs low and the frit is exposed to air.
Prevention: never leave a buffered line idle for more than 24 hours without flushing to at least 90% organic. Store the inlet frit in the same buffer it runs in, or in 20% methanol if it will sit for weeks. If you are running a method that uses high salt at low pH, put a 0.5 µm inline filter ahead of the column and change it every 500 injections, not when it plugs.
A troubleshooting checklist you can actually use
When a filter-related problem shows up, work through this in order. It saves time compared to swapping parts at random.
Symptom: rising backpressure over a run
- Check the inline filter first. If pressure drops when you bypass it, the filter is loaded. Replace it.
- If pressure drops only when you replace the column, the column frit is plugged. The filter upstream did not do its job. Check pore size and sample prep.
- If pressure rises and falls rhythmically, you have a check valve problem, not a filter problem.
Symptom: ghost peaks or a rising baseline
- Run a filter blank: filter HPLC-grade water through the suspect filter and inject. Any peak above 0.5 mAU at your detection wavelength is a problem.
- Check membrane compatibility with the sample solvent. Nylon plus acetonitrile is the classic culprit.
- Check the vial. Extractables from septa and glass are common. Use a vial insert with a known low-extractable glass grade for trace work.
Symptom: loss of analyte recovery
- Adsorption on the membrane. Proteins and hydrophobic peptides stick to nylon and PVDF. Switch to PES or regenerated cellulose for aqueous protein work.
- Filter volume too small. A 4 mm filter on a 1 mL sample can retain 5 to 10% of the sample in the housing dead volume. Use a filter sized for at least 2× the sample volume.
- Sample pH near the membrane’s charge point. Adjust pH or switch membrane chemistry.
Symptom: leaks at the filter housing
- Check torque. 0.5 to 0.7 N·m for stainless, 0.3 to 0.4 N·m for PEEK.
- Check ferrule condition. A ferrule that has been made up more than three times should be replaced.
- Check for cracks at the housing shoulder under a loupe. Cracks are invisible at atmospheric pressure and open under load.
Symptom: particulates reaching the column despite filtration
- Confirm the filter pore size is at least as small as the column frit. 0.22 µm for UHPLC, 0.45 µm for conventional HPLC.
- Check for filter bypass. A cracked housing or a frit that has been pushed back lets everything through.
- Check the sample itself. If it is a slurry or a digest, centrifuge first.
Selection criteria with numbers
When you specify a filter for a method, these are the parameters that matter. I would put them in a method SOP rather than leave them to the analyst’s judgment.
Pore size
0.22 µm for columns with sub-2 µm particles or frits rated at 0.2 µm. 0.45 µm for conventional 3 to 5 µm columns. 1 µm glass fiber prefilters upstream of either when particulate load is high.
Membrane diameter
13 mm for sample volumes under 1 mL. 25 mm for 1 to 10 mL. 33 mm for volumes above 10 mL or high-particulate samples. Undersizing is the most common cause of low recovery and slow filtration.
Housing material
Polypropylene is standard and compatible with most solvents. Avoid acrylic housings with acetonitrile and DMSO. For trace analysis at 210 nm, specify a housing with a low-extractable grade and ask for the extractables data.
Hold-up volume
A 13 mm filter typically holds 10 to 25 µL. A 25 mm filter holds 50 to 100 µL. For a 200 µL sample, that is a 10% loss. Size up or account for it in your recovery calculation.
Pressure rating
Syringe filters are typically rated to 5 to 7 bar (70 to 100 psi). If you are pushing a viscous sample through a 0.22 µm membrane, you will exceed that with hand pressure. Use a vacuum manifold or dilute the sample.
Frit specifications for inline filters
For a 10-32 coned inline filter, specify a 0.5 µm sintered stainless frit, a 316L housing, and a pressure rating of at least 400 bar. For UHPLC lines running above 1000 bar, use a PEEK or titanium housing rated to 1300 bar and check the fitting compatibility against the manufacturer’s specification. Agilent publishes fitting and torque data for their chromatography consumables and columns, and it is worth reading before you specify a non-OEM part.
Comparison: syringe filter vs inline filter vs guard column
These three get confused. They are not interchangeable. Here is the decision table I use.
- Syringe filter: sample prep, offline. Removes particles from the sample before injection. Pore size 0.22 or 0.45 µm. Single use. Cost per sample is low, but recovery loss and extractables are real. Best for dirty samples and small batches.
- Inline filter: flow path, online. Protects the column from particles generated downstream of the injector (pump seal wear, buffer precipitation). Pore size 0.5 to 2 µm. Replace every 500 to 1000 injections or when pressure rises by 10 to 15 bar. Low dead volume, no recovery loss.
- Guard column: flow path, online. Protects the analytical column from strongly retained compounds and from particles that get past the inline filter. Adds 5 to 20 bar of backpressure and a small dead volume. Replace every 100 to 500 injections depending on matrix.
The rule I follow: use a syringe filter on every sample, an inline filter on every method, and a guard column on any method with a complex matrix. The cost of all three is less than the cost of one column replacement and the lost instrument time.
Operational precautions that prevent most failures
These are the habits that separate labs with low filter failure rates from labs with high ones. None of them are expensive.
Degas and filter your mobile phase
Dissolved gas comes out of solution at the pump head and forms bubbles that look like check valve failures. Filter mobile phase through a 0.45 µm membrane and degas by helium sparge or vacuum for 10 to 15 minutes. Store reservoirs with a cap and a helium blanket if the method is sensitive.
Never let a buffered line go dry
Flush to at least 90% organic before storage. If the method uses a volatile buffer (ammonium acetate, ammonium formate), flush with water first, then organic, to avoid precipitating the buffer in the line. I have seen an ammonium acetate line plug solid in 48 hours because someone flushed straight to acetonitrile.
Use the right vial and insert
Particulates come from septa, from glass, and from the sample. Use a COD vial with a known low-particulate glass grade for trace work, and inspect septa for coring before use. A cored septum sheds a plug of silicone straight into the needle, and that plug ends up on the column frit.
Qualify new filter lots
Run a filter blank and a recovery check on every new lot. For a 0.22 µm PVDF filter, expect recovery of a 1 mg/mL caffeine standard to be 98 to 102%. If it is outside that, reject the lot. Ask the supplier for the extractables report and the lot-specific pore size data.
Train on torque, not on feel
Give every analyst a torque wrench and a fitting chart. Post the torque values at the instrument. The single biggest cause of mechanical filter failure is a well-meaning analyst who tightens until it feels right.
Track filter life
Log injection count and backpressure for every inline filter. Replace on a schedule, not on failure. A filter that has run 800 injections and is still at baseline pressure is a filter that is about to fail during a validation run.
Standards and references worth knowing
If you are writing a method or defending one in an audit, these are the references that come up.
- USP <621> covers chromatography system suitability and is the reference most pharmaceutical labs cite for injection precision and peak symmetry.
- USP <1058> covers analytical instrument qualification and is where you document filter qualification and lot-to-lot checks.
- EPA SW-846 is the reference for waste and materials test methods, and it specifies filtration and extraction steps for many matrices. The U.S. EPA SW-846 test methods page has the current method list and the sample preparation chapters.
- ISO 4793 covers laboratory sintered filter porosity grades, which is where the P-grade designations come from.
- GPI (Glass Packaging Institute) dimensional standards matter when you are matching vial inserts and caps to a specific autosampler.
For practical method development and troubleshooting notes, Restek’s technical resources for chromatography are a good field reference, and Thermo Fisher’s chromatography and sample handling pages cover filter and vial selection for their instrument platforms.
Recommendation
If I were setting up a lab tomorrow, here is what I would specify. A 0.22 µm PTFE syringe filter for organic-heavy methods and a 0.22 µm PES filter for aqueous protein work, both in 13 mm and 25 mm sizes. A 0.5 µm stainless inline filter ahead of every analytical column, rated to at least 400 bar and changed every 500 injections. A guard column on every method with a complex matrix. Torque wrenches at every instrument, set to 0.5 to 0.7 N·m for stainless and 0.3 to 0.4 N·m for PEEK. A filter log that tracks lot, injection count, and backpressure. And a rule that no buffered line sits idle for more than 24 hours without a flush.
That setup costs a few hundred dollars per instrument and prevents the failures that cost a column, a day of instrument time, and a re-run of a validation batch. The filters are not the weak point in an HPLC system. The way we specify, install, and replace them is. Fix that, and the filters stop being a troubleshooting topic and go back to being what they should be: a cheap insurance policy on a very expensive column.
References & further reading
Related resources from our lab consumables network:
- Hplc Filter at hplcfilters.com
- Ptfe Membrane Filter at ptfemembranefilter.com
- Cod Vial at codvial.com
- Vial Insert at hplcinsert.com
External references and standards: