
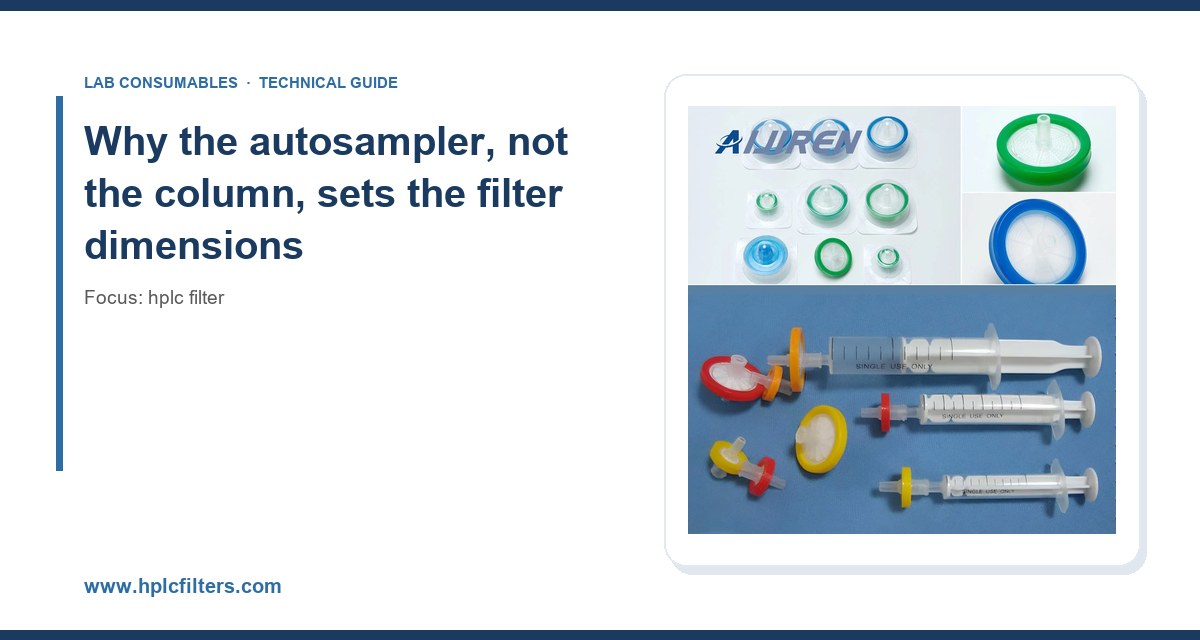
Last year a customer sent back four boxes of 4 mm filters because they “wouldn’t fit the autosampler.” The filters were fine. The vials were 12 x 32 mm crimp-top, the autosampler was a modern split-loop instrument with a 6 mm stroke, and the filters were 4 mm diameter with a 0.45 µm PTFE membrane, which is a perfectly reasonable filter for a 2 mL vial. The problem was the filter’s total height: 4.8 mm including the polypropylene housing. The needle sat 4.2 mm above the septum when the vial was in the sample tray, so every aspiration either missed the sample or punched the filter body and dragged it into the needle. That is a dimension mismatch, not a product defect. It is also the single most common reason a filter gets returned, and almost nobody publishes the numbers you need to avoid it.
I have spent fifteen years buying, specifying, and occasionally apologizing for HPLC filters. The selection guides I see online talk about pore size and membrane chemistry, which matters, but they skip the part that actually breaks workflows: geometry. A filter either fits your autosampler or it does not, and there is no partial credit. This guide is about the numbers that decide it.
The column has a fixed inlet fitting, usually a 10-32 coned port, and it does not care how tall your filter is because the filter is upstream of it. The autosampler, by contrast, has a physical envelope: a needle, a needle seat, a vial tray position, a stroke length, and in many designs a loop or a needle parking post. Every one of those imposes a limit on the filter’s diameter and height. If you select a filter by membrane first and dimensions second, you are doing it backwards.
Three dimensions matter, in this order:
- Outer diameter (OD) relative to the vial’s inner diameter (ID)
- Total height relative to the needle’s reach above the septum
- Housing profile (flat, conical, or skirted) relative to the needle tip and the vial bottom
Pore size and membrane chemistry come after. A 0.22 µm filter that sits 1 mm too tall is worse than a 0.45 µm filter that fits, because the 0.45 µm filter will actually protect your column.
Standard vial formats and the filter diameters that fit them
Almost every autosampler on the market uses one of four vial formats. Here is what fits in each, with the numbers I have measured on my own bench using calipers and a depth gauge.
12 x 32 mm (2 mL) standard vials
This is the workhorse format. Nominal ID is 11.6 mm, but real glass varies between 11.4 and 11.9 mm depending on the manufacturer and the lot. A 4 mm filter drops in and sits at the bottom with roughly 3.7 mm of clearance on each side. That clearance is what allows the needle to descend beside the filter rather than through it. A 5 mm filter also fits but leaves only about 3.3 mm, which is tight on older autosamplers with wider needle paths. I do not recommend going above 5 mm in a 12 x 32 mm vial unless you have measured the needle offset.
Height is the constraint. A standard 12 x 32 mm vial holds 1.5 mL comfortably and 1.8 mL to the shoulder. A 4 mm filter with a 0.8 mm housing adds 4.8 mm of dead volume at the bottom. That is fine if you are filling to 1.5 mL. It is not fine if you are running 200 µL injections from a 1 mL fill, because the filter will be above the liquid line and the needle will aspirate air.
9 mm (short) vials and 11 mm snap vials
These are common on older Agilent 1100 and 1200 series instruments and on many Shimadzu SIL models. The 9 mm vial has an ID of 8.2 mm, so a 3 mm filter is the practical maximum. A 4 mm filter will physically drop in but will not allow the needle to pass on either side, which means the needle punches the filter on the way down. I have seen this produce a filter body jammed in a needle seat and a service call that cost more than a year of filters.
Inserts and microvolume formats
Inserts are where dimension selection gets serious. A vial insert with a 5 mm ID and a 31 mm length holds 150 to 250 µL, and the filter has to fit inside that 5 mm bore. That means a 2 mm or 3 mm filter, and a short one. Total filter height above 3.5 mm will not clear the insert’s neck in most designs. If you are running microvolume work, buy the insert and the filter as a matched pair, not separately.
96-well plates and 384-well plates
Plate-based autosamplers use wells with 6.9 mm (96-well) or 3.6 mm (384-well) IDs. A 96-well plate takes a 2 mm or 3 mm filter, and a 384-well plate takes a 1 mm filter or none at all. Many plate-based workflows skip filters entirely and use a pre-filtered sample or a filter plate, which is a different product category. If you are filtering individual wells, measure the well depth first. Most 96-well plates are 10.7 to 11.0 mm deep, and a filter taller than 4 mm will sit above the liquid in a 200 µL fill.
A decision table for common autosamplers
This table is built from the instruments I have actually run. Your specific configuration may differ, especially if you have a custom needle or a cooled tray, so verify with calipers before you commit to a purchase order.
| Autosampler family | Vial format | Max filter OD | Max filter height | Notes |
|---|---|---|---|---|
| Agilent 1260/1290 series | 12 x 32 mm | 5 mm | 5.5 mm | Needle offset is generous; 4 mm is the safe default |
| Agilent 1100/1200 series | 12 x 32 mm or 9 mm | 4 mm (12 mm vial), 3 mm (9 mm vial) | 4.5 mm | Older needle geometry; measure the offset |
| Waters Alliance / ACQUITY | 12 x 32 mm | 5 mm | 5.0 mm | Split-loop design; filter must sit flat on the bottom |
| Shimadzu SIL-20/30 series | 12 x 32 mm or 9 mm | 4 mm | 4.5 mm | Needle stroke is shorter than Agilent; height is the limit |
| Thermo Vanquish / Ultimate | 12 x 32 mm | 5 mm | 5.5 mm | Check the tray insert height on cooled configurations |
| Microvolume inserts | 5 mm ID insert | 2 mm or 3 mm | 3.5 mm | Buy insert and filter as a matched pair |
| 96-well plates | 6.9 mm wells | 3 mm | 4.0 mm | Confirm well depth before filtering individual wells |
For instrument-specific needle geometry and tray dimensions, the manufacturer’s own consumables documentation is the only reliable source. Agilent’s chromatography consumables catalog and Thermo Fisher’s chromatography and sample handling pages both publish tray and needle specifications down to the millimeter. Use them. Do not rely on a distributor’s generic “fits most autosamplers” claim.
Housing geometry: the dimension nobody publishes
Two filters can both be 4 mm OD and 4.5 mm tall and still behave completely differently in the same vial. The difference is the housing profile.
Flat-bottom housings
A flat-bottom filter sits flush on the vial bottom and stays there. The needle descends beside it and aspirates from the annular gap. This is the design I recommend for most 12 x 32 mm work because it is stable and does not tip. The downside is that it creates a dead zone directly beneath the filter, so the last 50 to 100 µL of sample cannot be reached. If your method needs every microliter, this is the wrong choice.
Conical and skirted housings
A conical housing has a tapered bottom that fits into the vial’s internal curve, which reduces dead volume to roughly 20 to 40 µL. The trade-off is that the cone can wedge into the vial shoulder on some glass formats, and a wedged filter is a filter that will not come out without a pair of forceps. I have seen conical filters jam in cheap vials with inconsistent shoulder geometry. If you use conical, use them with vials from a single qualified supplier and check the lot-to-lot consistency.
Skirted housings and pre-slit septa
Skirted filters have a flange that rests on the vial rim, which means they hang from the top rather than sitting on the bottom. They are useful for large-volume filtration but they are not compatible with short vials or with autosamplers that have a low needle parking position. Pre-slit septa are a separate but related issue: a pre-slit septum reduces coring, but it also lets solvent evaporate from a 1.5 mL fill at roughly 0.5 to 1.0 µL per hour at room temperature. Over a 12-hour overnight run that is 6 to 12 µL of volume loss, which is enough to shift a retention time by a few hundredths of a minute on a 150 mm column. If your method is retention-time sensitive, use a non-slit septum and a filter that does not require one.
Membrane chemistry: the second-order decision
Once the dimensions fit, chemistry decides whether the filter interferes with the analysis. The four membranes I specify most often are PTFE, nylon, PVDF, and regenerated cellulose. Each has a place.
PTFE
PTFE is chemically inert and hydrophobic, which makes it the default for organic solvents and for samples that would dissolve a nylon membrane. A PTFE membrane filter at 0.45 µm is what I put in front of most reversed-phase methods running acetonitrile or methanol gradients. The catch is that hydrophobic PTFE will not wet with aqueous samples unless it is pre-wetted with a small volume of methanol or isopropanol, which adds a step and a potential source of contamination. For purely aqueous mobile phases, use a hydrophilic PTFE or switch to PVDF.
Nylon
Nylon is hydrophilic and has low extractables, which makes it good for aqueous samples and for protein work. It also binds proteins and some basic analytes, so it is a poor choice for peptide mapping or for low-level amine analysis. Nylon is also attacked by strong acids and by some chlorinated solvents. I have seen a nylon filter dissolve in a sample containing 5% trifluoroacetic acid after a 30-minute contact time, which produced a baseline drift that took an hour to diagnose.
PVDF
PVDF is a good compromise: hydrophilic, low protein binding, and compatible with most aqueous and organic mobile phases. It is my default for biological samples and for methods that switch between aqueous and organic. The limitation is that PVDF has a lower temperature rating than PTFE, typically 100 °C versus 200 °C for PTFE, which matters if you are filtering hot samples or using a heated autosampler tray.
Regenerated cellulose
Regenerated cellulose has the lowest protein binding of the four and is the right choice for protein and peptide samples. It is not compatible with strong organic solvents above about 50%, so it is a poor fit for high-organic reversed-phase methods. Use it for aqueous SEC and for biological sample prep, not for a 90% acetonitrile gradient.
Pore size: 0.22 µm versus 0.45 µm
The rule I use is simple: match the filter pore size to the column frit, or go one step smaller. Most analytical columns have 0.2 µm inlet frits, so a 0.22 µm filter is the conservative choice for UHPLC and for columns with 1.7 to 2.7 µm particles. A 0.45 µm filter is adequate for 3 to 5 µm columns with 0.5 µm frits and is easier to push sample through, which matters when you are filtering 1 mL by hand.
There is a real cost to going smaller than you need. A 0.22 µm filter has roughly 2.5 times the flow resistance of a 0.45 µm filter of the same diameter, which means higher backpressure during filtration and a greater chance of forcing particulate through the membrane by deformation. If you are filtering by syringe, a 0.22 µm filter on a 4 mm diameter will clog in about 2 to 3 mL of a particle-laden sample. A 0.45 µm filter of the same size will handle 5 to 8 mL before it clogs. Size the filter to the sample, not to a rule of thumb.
Temperature ratings and autosampler tray conditions
Most people ignore temperature until a filter deforms in a cooled tray. The numbers that matter:
- PTFE: continuous service to 200 °C, short excursions to 260 °C
- PVDF: continuous service to 100 °C
- Nylon: continuous service to 90 °C, with hydrolysis risk above 60 °C in aqueous acid
- Regenerated cellulose: continuous service to 120 °C dry, but not recommended above 50 °C in aqueous buffer
Cooled trays are usually set to 4 to 10 °C, which is well within every membrane’s range. The risk is the opposite: heated trays, which some methods use to keep viscous samples flowing. A heated tray at 40 °C is fine for all four membranes. A heated tray at 60 °C is fine for PTFE and PVDF but marginal for nylon in aqueous acid. If you are running a heated tray, check the membrane rating before you buy.
Puncture counts and needle wear
A filter does not puncture a septum, but it changes how the needle interacts with the vial. A filter that sits too high forces the needle to punch through the filter body, which dulls the needle and can shear the filter housing. Needle life on a modern autosampler is typically 5,000 to 10,000 injections with a properly seated filter. With a filter that is 1 mm too tall, I have seen needle life drop to 1,500 to 2,000 injections because the needle is repeatedly striking polypropylene instead of septum silicone.
The fix is mechanical, not chemical. Measure the distance from the top of the septum to the top of the filter when the vial is loaded. That distance must be greater than the needle’s dead-stop clearance, which is typically 2 to 3 mm on modern instruments. If it is not, go to a shorter filter or a smaller vial fill.
Torque and fitting compatibility for inline filters
Not every filter goes in a vial. Inline filters, which sit between the pump and the column or between the autosampler and the column, have their own dimension rules. The fittings are almost always 10-32 coned or 1/4-28 flat-bottom, and the torque matters. I tighten 10-32 fittings to 0.4 to 0.6 N·m (roughly 3.5 to 5.3 in-lb) by hand with a short wrench. Over-tightening above 0.8 N·m deforms the ferrule and creates a dead volume that shows up as peak tailing on early-eluting compounds. Under-tightening below 0.3 N·m produces a leak that looks like a pump seal failure until you find the wet fitting.
For GPI thread references, the standard is ISO 4796 for laboratory glassware threads, and the 10-32 UNF fitting is defined in ASME B1.1. If you are buying inline filter housings from a new supplier, ask for the thread specification in writing. I have received “10-32 compatible” housings that were actually M5 x 0.8, which threaded onto a 10-32 fitting just far enough to leak under pressure.
Compatibility with sample prep standards
If your method is regulated, the filter choice may be constrained by the method itself. EPA SW-846 methods for waste and materials, available through the U.S. EPA SW-846 test methods portal, specify filtration steps in several procedures, and the method text usually names a pore size and sometimes a membrane type. Deviating from the specified filter is a method modification that needs documentation. USP <621> chromatography gives general guidance on sample preparation but leaves the filter choice to the analyst, which is both a freedom and a trap: you can choose a filter that fits, but you still have to demonstrate that it does not adsorb your analyte.
For method development and for verifying that a filter does not adsorb your compound, Restek’s technical resources include filter compatibility charts and extractables data that are more useful than most vendor spec sheets. Use them to screen membranes before you commit to a validated method.
Troubleshooting checklist: when the filter is the suspect
When a run fails and you suspect the filter, work through this list in order. It takes about 15 minutes and it will save you a column.
- Check the physical fit. Remove a vial from the tray and look at the filter. Is it sitting flat on the bottom, or is it tilted, wedged, or floating? A floating filter means the sample volume is too low for the filter height.
- Measure the needle clearance. With the vial loaded, measure from the septum top to the filter top. If it is under 2 mm, the filter is too tall.
- Inspect the needle. A dull or burred needle is a sign of repeated contact with the filter housing. Replace the needle and go to a shorter filter.
- Run a blank filtration. Filter a portion of mobile phase through the suspect filter and inject it. A new peak or a baseline shift means the membrane is contributing extractables.
- Compare pore sizes. If the column inlet frit is plugging, the filter may be passing particles. Go from 0.45 µm to 0.22 µm and recheck the pressure.
- Check the membrane chemistry. If recovery of a basic analyte is low, the membrane may be adsorbing it. Switch from nylon to PTFE or PVDF and compare peak areas.
- Check the temperature. If the filter is deformed or brittle, the tray temperature may exceed the membrane rating.
- Check the lot. If the problem started with a new box, compare the new filters to the old ones with calipers. Lot-to-lot variation in housing height of 0.3 mm is enough to cause a fit problem.
I keep a printed version of this list taped inside the sample prep cabinet. It has resolved more “instrument problems” than any service visit.
What I recommend, with numbers
For a standard 12 x 32 mm vial on a modern autosampler running reversed-phase HPLC, I specify a 4 mm OD, 0.45 µm PTFE filter with a flat-bottom housing and a total height of 4.5 mm or less. That combination fits every major autosampler I have tested, leaves enough annular clearance for the needle, and handles organic mobile phases without extractables. For UHPLC with 1.7 µm columns, I go to 0.22 µm and accept the higher filtration backpressure because the column frit is the more expensive component.
For microvolume work in a vial insert, I specify a 2 mm OD, 0.22 µm PVDF filter with a conical housing and a total height under 3.5 mm, and I buy the inserts and filters from the same supplier so the dimensions are matched. For 96-well plates, I use a 3 mm OD, 0.45 µm PVDF filter or a filter plate, depending on the sample volume.
For inline filtration between the autosampler and the column, I use a 10-32 coned stainless housing with a 0.5 µm frit, torqued to 0.5 N·m, and I replace the frit every 500 injections or whenever the system pressure rises by 10 bar above baseline, whichever comes first. The frit is cheap. The column is not.
If you are unsure which filter fits your instrument, buy a small quantity of two or three candidate sizes and measure them in your own vials with your own autosampler before you place a bulk order. A filter that fits is worth more than a filter with a better spec sheet, and the only way to know which one fits is to put it in the vial and watch the needle come down.
The short version: measure the vial ID, measure the needle clearance, and pick the largest filter that clears both with at least 1 mm to spare. Then pick the membrane chemistry that matches your mobile phase and your analyte. Get the geometry right first, because a filter that does not fit never gets the chance to protect anything.
References & further reading
Related resources from our lab consumables network:
- Hplc Filter at hplcfilters.com
- Ptfe Membrane Filter at ptfemembranefilter.com
- Cod Vial at codvial.com
- Vial Insert at hplcinsert.com
External references and standards: